April 20th to 26th, the Great War Team Presents.....
Worldwide Warfare WeekOne hundred years ago, the world was engulfed in one of the greatest and most cataclysmic events in human history. From Europe the ripples of war spread to Asia, Africa, Oceania, the Mediterranean, the North Sea, the Atlantic, the Pacific, North America, even South America. This week we are going to have a massive variety of Great War events coming your way, touching many different areas of the globe, as the World War goes from being a European Conflict to truly Worldwide!
We could have called it Seven Strikes & Struggles, we could have called it Blazin' Battles, we could have called it Seven Days of Slaughter, we could have called it the April Showers of War, but in the end we settled on Worldwide Warfare Week.
For starters, we are launching seven new Great War autotournaments! Here is what you will see:
On April 20th, a new tournament by [player]JamesKer1[/player], will continue where Bergmann left off, with battles ongoing in the narrow passes of the Caucasus Mountains:
Ardahan and Sarkamish[spoiler=Ardahan and Sarikamish april 20th to 27th]After the Bergmann Offensive, the Russians continued to hold onto Ottoman Territory. In an effort to fight back against the Russians, the Germans and the Ottoman 3rd Army took on a joint mission in the capture of Ardahan and Sarikamish.
In the Battle of Ardahan, the city was captured in an operation commanded by German Lt. Col. Stange. The mission of Stange Bey Detachment was to conduct highly visible operations to distract and pin Russian units. Stange Bey's initial mission was to operate in the Chorok region. The unit was materially assisted by the rebellious Adjars of the country, who seized the road. Later Enver modified the original plan toward supporting the Battle of Sarikamish by cutting the Russian support link to Sarikamish-Kars line.
In a few short days, the 3rd Army received orders to advance towards Kars. In the face of the 3rd Army's advance Governor Vorontsov planned to pull the Russian Caucasus Army back to Kars. Yudenich ignored Vorontsov's wishes to withdraw, and stayed to defend Sarikamish. Enver Pasha assumed the personal command of the 3rd Army and ordered it into battle against the Russian troops.
20 Player Tournament
Round 1: Capture of Ardahan
x7 10-player games
3 Europa, 4 Classic Cities: Istanbul. Terminator, Fog, Unlimited Reinforcement, 30 Round Limit
20 Advance
Round 2: Advance towards Kars
x4 5-player games
4 Rail Europe. All Classic Settings, Parachute Reinforcement, 30 Round Limit
4 Advance
Round 3: Yudenich's Defense of Sarikamish
x4 4-player games
4 Siege! 2 Assassin, 2 Terminator, Fog, 30 Round Limit
2 Advance, Score Resets
Round 4: Russian Victory at Sarikamish, Ottoman Troops were immobile
x5 4-player Poly Games
5 Soviet Union, Trench, Adjacent, 20 Round Limit
1 Winner
-- JK1[/spoiler]
On April 21st, the latest epic tournament by [player]Dukasaur[/player] marks the third time that Serbia surprised the whole world and gave the mighty Habsburg Empire a good kick in the pants:
Kolubara/Rudnik Ridges[spoiler=kolubara and rudnik ridge april 21st to 28th]
Kolubara/Rudnik RidgeAfter the failure of the second Austrian invasion of Serbia at the Drina on Sept. 17, operations were suspended for some time. The Austrian 2nd Army had been transferred to the Russian front, leaving Potiorek with only two Armies, the 5th and 6th. Both the Austrian and Serbian High Commands expected Potirek to lay low until more troops became available. Significantly, however, he was not forbidden to undertake a new offensive - it is just that nobody expected him to.
During the period of relative quiet, the Serbs made a strategic withdrawal from the line on the Dvina that they held on Sept. 17th, to a shorter and more defensible line along the River Kolubara, a small tributary of the Sava.

It was here that on November 5th Potiorek resumed the offensive, launching the Austrian 5th and 6th Armies against the Serbian 1st, 2nd, and 3rd. Despite numeric superiority and a good defensive position, the Serbs were hamstrung by a desperate shortage of ammunition (especially artillery ammunition) and other supplies. Vigorous defensive actions had to depend on small arms fire and hand-to-hand combat.
By November 15th, the Serbian line was crumbling. An even deeper strategic withdrawal was required if the Serbian army was to avoid complete disintegration. In order to shorten the line, the radical step of abandoning the capital had to be taken. Austrian forces entered Belgrade on December 2nd.
With virtually the entire Austrian 5th Army in the Belgrade area mopping up, the 6th was left alone to face the the Serbs. Some ammunition finally arrived from Greece and France, and the Serbs were able to go on the offensive from their line along the Rudnik Ridge. King Peter I made a personal visit to the front lines, boosting morale. The Serbs attacked with vigour, and after five days of the bloodiest fighting thus far, the Austrians broke and began to withdraw. The Austrian 5th withdrew north across the Danube, while the 6th withdrew west across the Drina. The Serbs reclaimed their capitol on December 15th.
For the third time Potiorek had been defeated by the Serbs. Virtually all of Serbian territory was back in Serbian hands, and a demoralized Austrian army barely managed to retreat in good order. Potiorek was finally dismissed and replaced by Prince Eugene.
Serbia had lost 170,000 men killed, wounded, or captured, while Austria-Hungary had lost 215,000. To put it in perspective, the losses that
each side suffered in this
one campaign were greater than the combined losses of
all the nations in
all the battles of the First and Second Balkan Wars.
Note about nomenclature: A majority of writers refer to the entire campaign as the Battle of Kolubara. A minority refer to it all as the Battle of Rudnik Ridges. A few have split it up, with the Austrian offensive (from November 5th to December 2nd) being called Kolubara and the Serbian offensive (from December 3rd to 15th) being called Rudnik Ridge. This last system seems the best to me, clearly separating the two phases.

Serbian artillery in action once ammunition arrived.
-----------------------------------------------------------------------------------------------------------------------
Tournament Phase 1: Potiorek's third attempt to conquer Serbia began on Nov 5th 1914, and at first went well
30 players begin, 24 advance
5x Polymorphic games (randomly Poly dub and Poly trip) Flat Rate Foggy Parachute
Map: Austro-Hungarian Empire (representing the Austrian ascendancy in the early going)
-----------------------------------------------------------------------------------------------------------------------
Phase 2: Short on ammo and with huge casualty numbers, the Serbian army began to crumble
24 players begin, 18 advance
5x 6-player Terminator games Sunny Chained Escalator
Map: Random (representing the partial disintegration of the Serbian forces
-----------------------------------------------------------------------------------------------------------------------
Phase 3: Serbs imported ammo from France through Greece over the thin Balkan rail network
Scores Reset, 18 players begin, 12 advance
5x 6-player Standard games Foggy Flat Rate Chained
Maps: France, Ancient Greece, Balkan Peninsula, Rail Europe, Orient Express
(these maps represent the tenuous supply line from France to Serbia via Greece)
-----------------------------------------------------------------------------------------------------------------------
Phase 4: King Peter's visit to the front on Dec 3rd boosted Serbian morale and ignited the counteroffensive
12 players begin, 6 advance
5x 6-player Terminator games Foggy No Spoils Unlimited
Maps: 3x King's Court, 2x King's Court II (representing the King's visit and its powerful effect)
-----------------------------------------------------------------------------------------------------------------------
Phase 5: By December 15th Potiorek was in full retreat and Serbia was intact
6 players
5x 6-player Assassin games Sunny Escalating Chained
Maps: 3x Balkan Peninsula, 2x Europe 1914 (representing a restoration of the status quo at the beginning of the war)
-- DK[/spoiler]
On April 22nd, a tournament by [player]DoomYoshi[/player] completes the saga of the Fall of the German East Asia Squadron, illustrating key lessons of naval warfare with some very appropriately chosen maps and settings:
Falkland Islands[spoiler=falkland islands april 22nd to 29th]
The Fall of the German East Asia Squadron Part II of IIThe rest of the East Asia Squadron, after the surprising victory at Coronel, started heading home to Germany. 300 members of the crew were awarded Iron Crosses and Spee himself received the Iron Cross First Class. They continued raiding until they reached the Falklands. At this point, Spee decided to raid this base as well. This battle taught us 5 very important lessons:
Round 1: Listen to your junior officers.
It is said that almost the whole fleet opposed the raid on the Falklands, as the ships already had as much coal as they could carry.
32 start
3 quads games, No Spoils, Fog, Chained, 1982
Round 2: If you are outgunned, fire first.
When the Germans arrived, the entire British fleet was coaling! However, Spee regrouped and then attempted to flee.
32 advance
5 4 player games, Flat Rate, Fog, Parachute, Arms Race, FreeStyle
Round 3: The well-rested crew wins.
Sturdee (the British Admiral) after hearing of news of the German arrival, ordered his crew to breakfast while the ships were still re-coaling. This was in contrast to the Germans, who were not able to port for more than 24 hours in a few weeks (due to naval war rules).
18 advance
4 6 player feudal games, Escalating, Fog, Unlimited
Round 4: Greater firepower really does pay off.
The
Invincible and
Inflexible were much faster and more powerful than the German squadron, and victory was very one-sided.
16 advance into bracket
5 poly trips Flat Rate, Unlimited, Sunny, Pearl Harbor
Round 5: Sometimes in war, luck is enough.
Sturdee's entire mission was to track down and eliminate Spee's squadron. Lucky for him, they came right to him.
2 players advance
1 2 player game, Flat Rate, Unlimited, Sunny, Pearl Harbor
Even though there was substantial success, and a great legend formed with German East Asia Squadron, it all eventually perished. In that final battle, nearly 2000 were killed and 200 captured. 2 ships escaped, one of which carried many crew members who eventually made it home. The other was eventually scuttled. With that, the naval war had mostly ended in the Pacific and Atlantic, until the U-boat fleets started booming.
-- DY[/spoiler]
On April 23rd, the tournament by [player]robellis00[/player] that won the
Battle of Bolimów Autotourney Design Contest will launch. Written by a freemium player, with his fellow freemium players in mind, it is appropriate that this will be a full
freemium-exemption tournament, meaning that freemiums can join even if they don't have a slot available:
Battle of Bolimów[spoiler=battle of bolimov april 23rd to 30th]
Battle of Bolimów http://i1164.photobucket.com/albums/q569/rob_e_cc/215ba5ea-b350-444d-ba6d-0bdc4795ff98_zpsl7uuulcz.jpg
Battle of Bolimow Auto Tourney (Freemium Friendly!)
The Battle of Bolimow is not one of those famous battles that everyone knows the name. However, it did turn out to be a very important battle in the history of warfare.
Near the end of January 1915, the German Ninth Army under General Mackensen, was located southwest of Warsaw, Poland near the village of Bolimów. The Russian Second Army under Smirnov was positioned south of Warsaw, waiting for the Germans to make their move.
Strategically, there is very little that would make Bolimów an important target. There is however, a rail line situated close-by, which during WWI became a strategic necessity in order to reinforce your position. The Germans needed the Russians to believe that the rail line was an important objective. You see, in the larger strategy, the Germans were trying to draw the Russian army away from East Prussia. The Germans wanted to launch a large offensive there, and wisely wanted less resistance. If the Germans could secure the rail line, then head into Warsaw, it would be bad for the Russians.
On 31 January 1915, the Germans opened an artillery barrage of the Russian lines. The only thing different about that particular artillery barrage was that the Germans, for the first time in the history of warfare, used artillery shells that contained chemical agents. The shells were equipped with an explosive that would dissipate the chemical agents across the battlefield, incapacitating the enemy. The Germans fired some 18,000 chemical artillery shells at the Russian lines to soften them up before their infantry assault. As it happened, there were two things working against the Germans that day. First, the wind was blowing away from the Russian lines, toward the German line, so the chemical attack did not affect the Russians. Secondly, the wintery-January temperatures actually prevented the chemicals from dispersing and were totally ineffective.
Once the Germans realized this, they called off their offensive, which the Russians decided to take advantage of. They counter-attacked, and lost heavy casualties as more German artillery rained down on them. Some 40,000 Russian casualties, compared to 20,000 German casualties meant that in the eyes of the Germans they had won the day. More importantly, they achieved their objective of drawing Russian troops away from Prussia, so it was an operational success.
Though the employment and failure of their use of chemical weapons placed a huge blemish on the German Army that day, things would soon change for them as they (and the Allies) got better and better at using chemical weapons shortly after the Battle of Bolimow.
Entry Membership: Open to all; Freemium Friendly
It is short, and some popular maps to entice more freemiums to participate.
16 Players; Seeded by Score
Rounds: 4
Game load: 1 game; 4 total
Draw: Seeded by Score
Round Details:
Round 1: 16 Start, Seeded by score, 1 Game, 8 Move on.
The first important thing to note about this battle is that it brought about a change in warfare, not just for the battle, or the operation, but for warfare in general from that moment on. The rest of WWI would see countless uses of chemical weapons. For that reason I chose Europe 1914 map. Also, the nuclear and fog setting lend to the actual battle events of chemical weapon usage.
Games: 2 players, Standard, Automatic, Sequential, Nuclear, Chained, Fog, 20 Rounds, 24 hours.
Map: Europe 1914.
Round 2: 8 Start, Seeded by score, 4 move on.
The second most important thing about this battle is that the railway created a perfect ruse for the Germans to deceive the Russians. The railway was important, but not the main objective. For that reason, I chose the Rail Europe map. Again, keeping with the nuclear setting, but making it sunny since it was not the main objective.
Games: 2 players, Standard, Automatic, Sequential, Nuclear, Chained, Sunny, 20 Rounds, 24 hours.
Map: Rail Europe.
Round 3: 4 Start, Seeded by score, 2 move on.
The next most important fact regarding this battle was that the freezing temperatures had a devastating effect on the gas, rendering it innocuous. To represent the bitter cold, and the unknowable mystery of what might happen when using this new weapon, I chose the Age of Realms 2: Magic map. Again, the nuclear, fog, and trench settings, really capture the battle circumstances.
Games: 2 players, Standard, Automatic, Sequential, Nuclear, Chained, Fog, Trench, 20 Rounds, 24 hours.
Map: Age Of Realms 2: Magic.
Round 4: 2 Players, 1 Winner.
Lastly, the end of the battle deteriorated into the old stand-by tactics that we see throughout WWI. Therefore, the trench warfare map makes the most sense, keeping with the nuclear and fog settings, but changing the reinforcements to parachute to help with gameplay.
Game: 2 players, Standard, Automatic, Sequential, Nuclear, Parachute, Fog, 20 Rounds, 24 hours.
Map: Trench Warfare
Sources:
http://en.wikipedia.org/wiki/Battle_of_Bolim%C3%B3whttps://archeopressja.wordpress.com/roa ... f-history/http://www.firstworldwar.com/battles/bolimov.htmhttp://www.h100.tv/article/the-battle-of-bolimovmap source:
http://www.milex.de/forum/suche.php?page=12-- RE00[/spoiler]
On April 24th, we will mark ANZAC Day with a tournament by [player]Dukasaur[/player] written especially for the occasion:
ANZAC Day[spoiler=anzac day april 24th to may 1st]
ANZAC DAYSome background from the wikipedia entry:
wikipedia wrote:Anzac Day /ˈænzæk/ is a national day of remembrance in Australia and New Zealand that broadly commemorates all Australians and New Zealanders "who served and died in all wars, conflicts, and peacekeeping operations" and "the contribution and suffering of all those who have served."[1][2] Observed on 25 April each year, Anzac Day was originally to honour the members of the Australian and New Zealand Army Corps (ANZAC) who fought at Gallipoli against the Ottoman Empire during World War I. Anzac Day is also observed in the Cook Islands, Niue, Pitcairn Islands, and Tonga, and previously also as a national holiday in Papua New Guinea and Samoa.[3][4] It is unofficially recognized and observed in Newfoundland, as they were an independent dominion and the Royal Newfoundland Regiment was the only North American unit to fight at Gallipoli.
wikipedia wrote:Anzac Day marks the anniversary of the first campaign that led to major casualties for Australian and New Zealand forces during the First World War. The acronym ANZAC stands for Australian and New Zealand Army Corps, whose soldiers were known as Anzacs. Anzac Day remains one of the most important national occasions of both Australia and New Zealand,[5] a rare instance of two sovereign countries not only sharing the same remembrance day, but making reference to both countries in its name.
wikipedia wrote:Though the Gallipoli campaign failed to achieve its military objectives of capturing Constantinople and knocking the Ottoman Empire out of the war, the actions of the Australian and New Zealand troops during the campaign bequeathed an intangible but powerful legacy. The creation of what became known as an "Anzac legend" became an important part of the national identity in both countries. This has shaped the way their citizens have viewed both their past and their understanding of the present
wikipedia wrote:With the coming of the Second World War, Anzac Day became a day on which to commemorate the lives of Australians and New Zealanders lost in that war as well and in subsequent years. The meaning of the day has been further broadened to include those killed in all the military operations in which the countries have been involved.
All of the above are from http://en.wikipedia.org/wiki/Anzac_DayIn tournament terms, we will celebrate ANZAC Day with the following maps:
Australia (representing Australia)
New Zealand (representing New Zealand)
Oceania (representing Australia and New Zealand and their dependencies and/or former dependencies the Cook Islands, Niue, Pitcairn, and Tonga)
WWI Gallipoli (representing the landings at Gallipoli)
WWI Ottoman (representing the main adversary at Gallipoli)
Golfe du Saint-Laurent (respresenting Newfoundland, which also celebrates ANZAC day in honour of the Royal Newfoundland Regiment)
WWII Australia (representing the expansion of the theme of ANZAC day beyond WW I to WW II and Korea)
All seven maps will be played in each phase of the tournament.
Phase 1: Polymorphic Dubs, No Spoils Foggy Parachute
Phase 2: 6-player Terminator, Sunny Escalating Unlimited
Phase 3: 1v1, random spoils, random forts, random fog and trench
Phase 4: 8-player Standard, Foggy Flat Rate trench
(Anzac Day is actually April 25th, but it is celebrated mainly by Anzacs, and with the march of the time zones it is already April 25th for them when it is still April 24th for most of us, so we're launching the tourney at a time that will make it feel right for them)-- DK[/spoiler]
On April 25th, an all-1v1 tourney should satisfy 1v1 aficionados with the follow-up battle to the Basra landings:
Qurna[spoiler=Qurna april 25th to may 2nd]
QurnaThe battle of Qurna was a relatively small encounter where Ottoman troops retreating from their defeat at Basra attempted to hold the line and prevent further British expansion. The British, after three attempts, succeeded in forcing the Ottomans troops to surrender, thereby guaranteeing a safe front line for their bridgehead at Basra and the Abadan oil fields.
Fuller account:
http://en.wikipedia.org/wiki/Battle_of_Qurna[bigimg]http://upload.wikimedia.org/wikipedia/commons/5/56/Meso-WW1-2.jpg[/bigimg]
"Meso-WW1-2" by created by the Department of Military Art and Engineering, at the U.S. Military Academy (West Point). - available on the West Point web site at:http://www.dean.usma.edu/history/web03/atlases/great%20war/great%20war%20%20pages/great%20war%20map%2046.htmOriginally uploaded to EN Wikipedia by Cglassey 28 April 2006. Licensed under Public Domain via Wikimedia Commons - http://commons.wikimedia.org/wiki/File:Meso-WW1-2.jpg#/media/File:Meso-WW1-2.jpgThis will be a 16-player elimination bracket, with each round being a simple best-of-seven 1v1 games.
In each round of the tournament, you will play seven maps:
Eastern Hemisphere (representing the British Empire)
Indian Empire (representing the approximately 2/3 of the British Imperial troops who were from India)
Battle for Iraq! (representing Basra and the Abadan oil fields that motivated this operation)
Middle East (representing the regional geography)
Gilgamesh (representing the awesome importance of the Tigris River)
WW I Ottoman (representing the Ottoman Empire)
Random (representing the unpredictabilities of war)
Round 1: The British move up the Tigris, accompanied by gunboats
default settings except nuclear spoils and fog (representing the offsetting advantage given the British by their naval artillery and the Ottomans by their knowlege of the topography)
Round 2: The Ottomans are entrenched at Qurna
default settings except no spoils and trench (representing the entrenchment of the Ottomans)
Round 3: The Norfolk Regiment makes an amphibious landing behind the Ottoman lines and traps the defenders
default settings except parachute (representing the advantage given by the amphibious deployment)
Round 4: After a negotiation, the Ottomans surrender
default settings except no forts (representing the lack of reinforcement)
-- DK[/spoiler]
On April 26th, another entry by [player]DoomYoshi[/player] will present a very equivocal battle in the North Sea:
Dogger Bank[spoiler= dogger bank april 26th to may 3rd]
Battle of Dogger Bank, 24th January, 1915This battle started as a German raid in the North Sea at Dogger Bank. Due to some intercepted radio contact, the far greater British Navy was waiting for them. Even though the battle was nominally a British victory, both sides' commanders were subsequently replaced.
All rounds 6-player Terminator Escalating, Sunny, ChainedRound 1: Why the British WonThe Germans lost the
Blucher, an armored cruiser based on the designs for the
Invincible. This was the last armored cruiser built by the German Empire. The British only had one ship with serious damage, the
Lion which was drydocked for 4 months afterwards.
36 start, No eliminations
Play 5 games on Eastern Hemisphere
Round 2: Why the British LostDue to an electric failure, the British had to communicate with flags. The order to chase down the remaining Germans after the
Blucher was disabled was given by 2 flags "Course NE" (the direction of the
Blucher, and "engage". This was misconstrued as an order to finish off the lone German.
Play 5 games on 13 Colonies
Round 3: Why The Germans LostAfter this battle and Heligoland Bight, it was clear to the Germans that even raiding in the North Sea would not work. The Royal Navy's might had been proven time and time again through this war. Many of the expensive ships which the Germans operated were stuck in harbor throughout the war, hiding behind minefields.
Play 5 games on WW II Europe
Round 4: Why the Germans WonThe losses could have been much worse. It is entirely conceivable that the entire raiding/scouting fleet was destroyed. The subsequent Kaiser's orders to cease all on-water engagements focused the German navy on the U-boats, which made the navy much stronger.
Play 5 games on Holy Roman Empire
The maps are chosen to represent high and low points in British and German history.
-- DY[/spoiler]
"But wait!" you cry, "I don't have enough tokens to enter seven new tournaments!" The Conquer Gods feel your pain, and they will be trying to help out. As of yesterday, the Conquer Gods started dropping Great War tank tokens! By the end of the week everybody should have gotten 2 or 3 from random drops. Hope that helps! Of course, that will not be enough if you want to join all seven tourneys, so I hope you have been saving some up over the last month! You will almost certainly have to join some token dropping games, which you can always find by in the
Current list of Great War token-dropping maps.
But that's not all!
This week we release DoomYoshi's new Scenario:
1914 Proper. This scenario attempts to correctly duplicate the relative strengths and strategic advantages of the eight major European powers. (
Note: as is typical for a Scenario, this is not play-balanced. Don't worry, no points change hands in Scenarios, so if you get one of the weaker nations, it won't hurt you. I think, very honestly, that this represents the very best use of Scenarios, attempting to present a historical situation as it actually happened, and I think it does a excellent job of that!) In addition to being a great way to study the historical situation and the advantages and disadvantages of each major power,
this scenario also drops tokens!Plus, DOWN UNDER TRIVIA in the Chat Rooms http://www.conquerclub.com/forum/viewtopic.php?f=1&t=207817&p=4655406#p4655406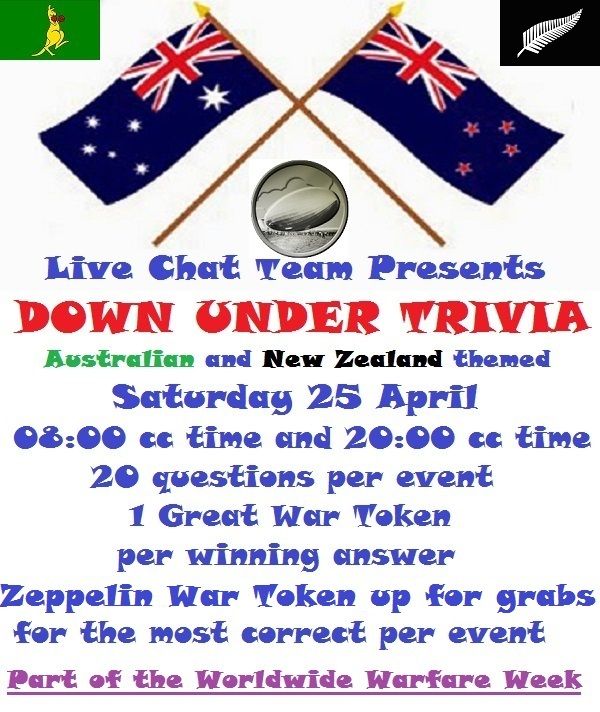 Plus,
Plus, a Great War-related event in the Off-Topics forum! Watch for further announcements!


